Piercing a baby’s ears has always sparked debate, with people divided on its safety and ethics. While some see it as a harmless tradition or a personal choice, others worry about consent, health risks, and the child’s autonomy. The controversy flared up when celebrity influencer Kylie Jenner posted a photo of her daughter, Stormi Webster, with pierced ears. This picture led to widespread discussion and criticism, once again bringing attention to the ongoing debate about piercing babies’ ears.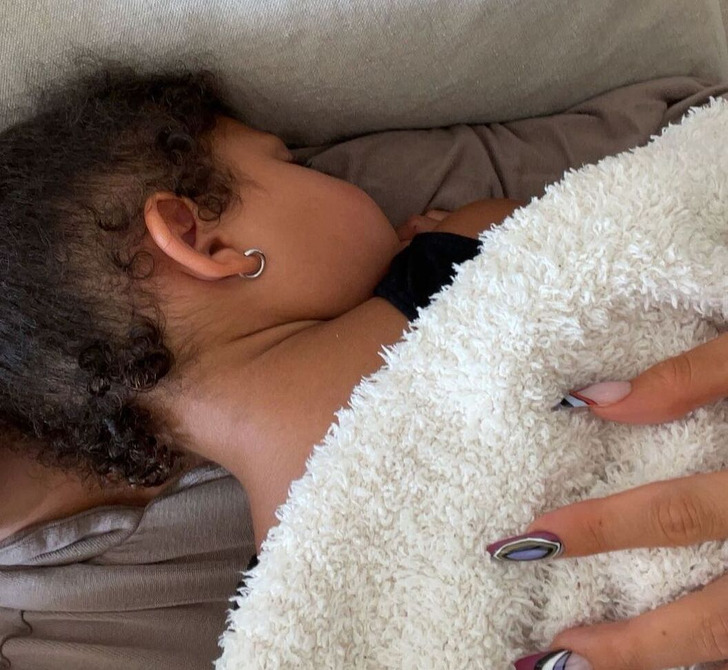
Lots of babies around the world get their ears pierced, but it’s the earlobes of famous babies that get people talking online about whether it’s safe for little ones to wear jewelry. When her daughter Stormi Webster was five months old, Kylie shared a picture of her lying on a bed in a softly lit pink room. Followers noticed the tiny studs in Stormi’s ears, which were barely visible but still caught their attention.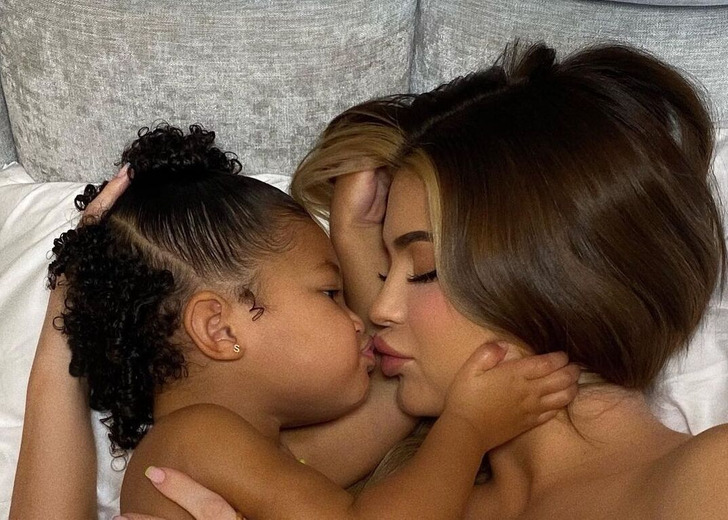
Jenner is used to social media controversies, but the criticism about her young daughter and parenting skills is particularly harsh this time. Some strongly argue against piercing a baby’s ears, while others call Jenner “cruel” and “thoughtless.” “Is she going to start putting big earrings in her [ears] now [they’re] pierced? A [baby’s] ear is still forming and growing at that age,” one user wrote. “Piercing a babies ears!!!! @kyliejenner be ashamed of yourself. This is utterly disgraceful,” another follower commented.
Although getting a baby’s ears pierced is usually seen as safe, doctors warn about the risk of infections. Some suggest waiting until your baby is around 4 months old. However, the American Academy of Pediatrics doesn’t have a clear rule on when it’s best to pierce ears. They recommend waiting until a child can take care of the piercing themselves, but they don’t say no to piercing babies.
Kylie Jenner and her former partner Travis Scott gained notice for their unique parenting style. Travis revealed that they give their toddler Stormi a lot of independence. He mentioned they let Stormi choose her bedtime, deciding whether she wants to sleep at the usual time or stay up later. Stormi consistently chooses bedtime, which surprises many parents who appreciate her commitment to a good sleep routine.
Some parents think piercing their baby’s ears heals faster when they’re young. Others believe it’s important to respect their child’s autonomy and find piercing without consent unethical. Although tiny earrings might look cute, they can be dangerous for babies, causing injuries during play or even choking hazards.
Meu ex e eu nos conhecemos na festa de aniversário do meu melhor amigo – encontrei a casa dele quase destruída quando acordei
Um casal apaixonado | Fonte: Unsplash
Agora, minha ex-namorada é a ruína da minha existência, aquela que transformou nosso romance de conto de fadas em um pesadelo vivo. Costumávamos ser inseparáveis, a dupla dinâmica que nossos amigos chamavam de “B&B”, mas agora nos odiamos mil vezes mais do que jamais nos amamos.
Recentemente, encontrei Betty na festa de aniversário do meu amigo Josh e, deixe-me dizer, levei o maior choque da minha vida quando acordei com um pesadelo na manhã seguinte.

Um homem chocado cobrindo a boca com um pano preto | Fonte: Pexels
Foi assim que tudo começou.
Quando entrei na festa, lá estava ela — Betty, conversando animadamente com alguns convidados. No momento em que ela me viu, seu rosto caiu, e nós nos olhamos. Eu me preparei, sabendo que isso só poderia acabar mal.
Com certeza, Josh se aproximou com uma cerveja, pensando que seria uma ótima ideia tentar nos fazer conversar.
“Ei, B&B! Trouxe uma bebida para vocês. Por que vocês dois não vêm aqui e conversam?” ele disse, com um sorriso esperançoso no rosto.

Um homem segurando uma garrafa de cerveja | Fonte: Pexels
Mas a expressão de Betty rapidamente azedou. “Conversar? Com ele?” ela zombou, pegando uma garrafa de vinho da mesa próxima. “Vou quebrar a cabeça dele agora! O que ele está fazendo aqui?”
Olhei feio para Josh. “Cara, que diabos?? Você prometeu que ELA não estaria aqui. Por que você a convidou??”
Os insultos começaram a voar, e nossos amigos tiveram que intervir para nos manter separados. A noite toda foi tensa, com Betty e eu nos evitando a todo custo. Não pude deixar de pensar em como acabamos nessa confusão.

Uma mulher furiosa segurando a cabeça | Fonte: Pexels
Vários meses antes, Betty e eu nos conhecemos no casamento de uma amiga em Paris, de todos os lugares. Foi um daqueles encontros casuais que pareciam bons demais para ser verdade. Nós conversamos e trocamos números, e em pouco tempo, éramos inseparáveis.
“Você acredita? Nós nos conhecemos em um casamento em Paris e agora estamos aqui, juntos,” eu disse a ela, meu coração disparado.
Ela sorriu, aqueles lindos olhos brilhando. “Eu sei, é como algo saído de um filme. Estou tão feliz por ter encontrado você, Brady.”

Um casal romântico se abraçando | Fonte: Unsplash
Aqueles primeiros dias foram como um conto de fadas… jantares românticos, beijos roubados e risadas sem fim. Estávamos completamente apaixonados um pelo outro.
Então as coisas tomaram um rumo selvagem quando decidimos arriscar e morar juntos. A proximidade só pareceu amplificar nossas diferenças.
Eu trabalhava no turno da noite, enquanto Betty trabalhava das 9 às 5, então nossos horários nunca coincidiram.

Um homem em seu escritório | Fonte: Pexels
“Por que você não atende minhas ligações? Estou sentada aqui sozinha neste apartamento vazio!” Betty gritava pelo telefone, sua voz cheia de frustração.
“Estou no trabalho, Betty. Você sabe minha agenda. Podemos falar sobre isso depois?”, eu implorava, tentando manter a calma.
Mas ela não quis. “Não, precisamos conversar sobre isso agora! Você nunca está aqui quando preciso de você.”

Retrato de uma mulher furiosa gritando | Fonte: Pexels
As brigas começaram pequenas, por coisas bobas, como ela querer que eu a levasse ao salão de beleza quando eu tinha uma reunião importante com um cliente.
“Brady, é só uma ida rápida ao salão. Você não pode reservar um tempo para mim?”, ela choramingava.
“Betty, tenho uma reunião que pode fazer ou desfazer esse acordo. Não pode esperar?”, eu argumentava, já sentindo a tensão aumentando.

Um casal frustrado sentado em um banco de madeira | Fonte: Pexels
Mas eles rapidamente escalaram, e logo estávamos brigando pela menor provocação. A gota d’água veio quando Betty gritou comigo na frente de todos os meus amigos.
“Você não é um homem melhor para mim, Brady! Você não me mantém feliz de jeito nenhum”, ela gritou, com lágrimas escorrendo pelo rosto.
Eu não aguentava mais. Fiz as malas e saí do apartamento naquela mesma noite, terminando com ela para sempre.

Um homem fazendo as malas | Fonte: Pexels
Desde então, nós estávamos nos evitando como uma praga, mas não era fácil quando você tinha muitos amigos em comum. É por isso que eu tinha evitado festas e reuniões sociais, com medo de encontrá-la novamente.
Mas quando Josh me convidou para sua festa de aniversário, eu não pude dizer não. O cara tinha passado pelo inferno e voltado por causa do câncer, e eu devia a ele estar lá.
Então, eu apareci, me preparando para o inevitável. Agora, vamos voltar para aquele pesadelo de festa de aniversário onde tudo começou.
“O que esse perdedor está fazendo aqui?” ela gritou novamente, olhando feio para Josh.

Retrato em close de uma mulher furiosa | Fonte: Pexels
Josh, que Deus o abençoe, tentou bancar o pacificador. “Uau, uau, vamos todos nos acalmar. Betty, pensei que seria bom para você e Brady—”
“Você prometeu que ele não estaria aqui. Por que o convidou?” Betty interrompeu, seus olhos brilhando de raiva.
Acabamos em uma discussão acalorada novamente, com nossos amigos tentando nos impedir de nos separar. O resto da festa foi um borrão de bebidas e música.

Um casal discutindo entre si | Fonte: Pexels
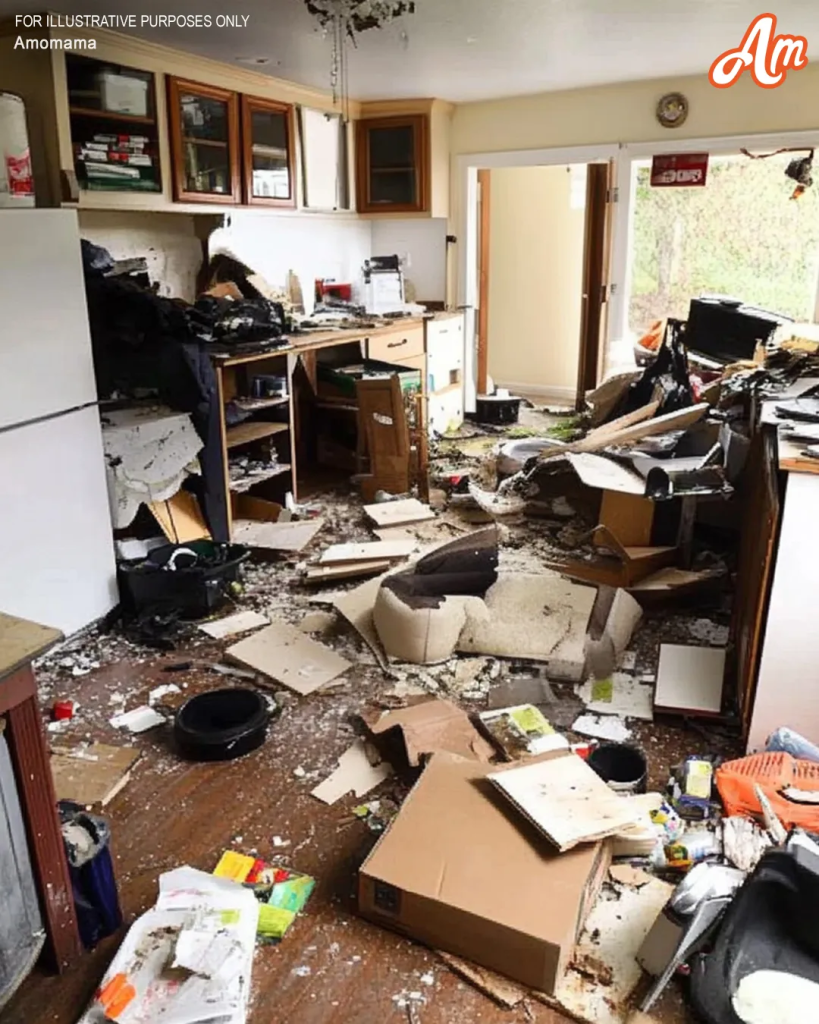
Quando finalmente acordei na manhã seguinte na casa de Josh, eu estava desorientado e não tinha ideia do que tinha acontecido. Mas uma coisa estava clara — a cozinha de Josh estava uma bagunça completa. Armários estavam quebrados, pratos estavam espalhados por todo lugar e parecia que um tornado tinha varrido o lugar.
Betty entrou, igualmente perplexa. “O que diabos aconteceu aqui?” ela exclamou, observando a destruição.
Balancei a cabeça, igualmente confuso. “Não tenho ideia. Quem fez isso?”

Uma cozinha em caos | Fonte: Midjourney
Nesse momento, meu telefone tocou. Era Josh, e uma verdade chocante veio à tona.
“Vocês dois idiotas brigaram bêbados ontem à noite e destruíram minha casa!” ele gritou, sua voz tingida de frustração. “O senhorio está furioso e quer tudo consertado até hoje à noite. É melhor vocês irem lá e começarem a limpar!”
Com o tempo se esgotando, Betty e eu relutantemente começamos a limpar a bagunça, constantemente discutindo e culpando um ao outro.

Um homem falando ao telefone | Fonte: Pexels
“Isso é tudo culpa sua, sabia? Se você não tivesse aparecido, nada disso teria acontecido”, Betty retrucou, esfregando uma bancada com mais força do que o necessário.
“Minha culpa? Foi você quem pegou a garrafa de vinho e começou a gritar!”, retruquei, varrendo cacos de cerâmica quebrada.
Mas, conforme esfregávamos e arrumávamos, algo começou a mudar. Percebemos que, se quiséssemos consertar isso, precisávamos deixar nossas diferenças de lado e trabalhar juntos.

Um homem varrendo o chão | Fonte: Pexels
Hora após hora de agonia, colocamos nossos corações em ação para restaurar a casa de Josh à sua antiga glória, determinados a deixá-la impecável antes que o proprietário retornasse.
“Não acredito que estamos fazendo isso. É como se fôssemos uma maldita equipe de limpeza”, Betty resmungou, limpando uma prateleira.
“Bem, não teríamos que fazer isso se você não tivesse enlouquecido ontem à noite”, retruquei, estremecendo quando as palavras saíram da minha boca.

Uma mulher furiosa cruzando os braços | Fonte: Pexels
Betty fez uma pausa, e por um momento, pensei que ela fosse começar outra discussão. Mas, em vez disso, ela soltou um suspiro pesado.
“Você está certo. Sinto muito, Brady. Vamos só… acabar logo com isso, ok?” ela disse, sua voz mais suave do que eu tinha ouvido em meses.
Eu assenti, um pequeno sorriso puxando os cantos dos meus lábios. “OKAAAA!”

Retrato de uma mulher olhando para o lado | Fonte: Pexels
Quando nossos amigos apareceram naquela noite, eles ficaram surpresos com o quão boa a casa parecia. Então Josh deu um passo à frente, sorrindo maliciosamente.
“Adorei o truque, amigo?” ele disse, rindo. “Vocês dois finalmente… CONVERSARAM!!”
No começo, Betty e eu ficamos furiosas, prontas para atacar Josh e os outros. Mas quando trocamos um olhar, algo mudou. Toda a raiva e ressentimento que estávamos guardando pareceram derreter, substituídos por um anseio pela conexão que um dia compartilhamos.

Um homem rindo | Fonte: Pexels
Antes que eu pudesse reagir, Betty se jogou em meus braços, com lágrimas nos olhos. “Senti sua falta, idiota!”, ela exclamou, enterrando o rosto em meu peito.
Nossos amigos comemoraram, e assim, as paredes entre nós desabaram. Podemos ter nos odiado, mas a verdade é que só nos odiávamos porque nos amávamos profundamente.

Um homem beijando uma mulher no nariz | Fonte: Unsplash
Enquanto nos abraçávamos, percebi que, apesar de todos os altos e baixos, Betty e eu estávamos de volta aos trilhos. Dessa vez, eu estava determinada a fazer as coisas de forma diferente. Chega de brigas por coisas bobas, chega de nos darmos por garantidos.
Eu queria valorizar cada momento e construir um amor duradouro que pudesse resistir ao teste do tempo.
“Sabe, nós passamos por muita coisa, você e eu”, murmurei, acariciando o cabelo de Betty enquanto ela dava um beijo na minha testa.

Uma mulher beijando um homem na testa | Fonte: Unsplash
Ela olhou para mim, seus olhos brilhando. “Eu sei. Mas é isso que nos torna fortes, certo? Nós vimos o pior um do outro, e ainda estamos aqui.”
Eu assenti, uma onda de emoções me inundando. “É, e eu não quero perder isso de novo. Eu quero que a gente faça dar certo, Betty. De verdade dessa vez.”
“Eu também,” ela sussurrou. “Nada mais de brigas, nada mais de tomar um ao outro como garantido. Só você e eu, ok?”
Puxei-a para mais perto, meu coração inchando de esperança. “Okay.”

Um casal de mãos dadas | Fonte: Unsplash
Ao sairmos da casa de Josh, de mãos dadas, não pude deixar de sentir uma sensação de esperança. Esperança por um futuro em que poderíamos navegar pelos altos e baixos da vida juntos, com mais momentos doces do que amargos.
Não seria fácil, mas se alguém poderia fazer isso funcionar, éramos nós — B&B, a dupla dinâmica, reunida e pronta para enfrentar o mundo.

Vista traseira de um casal se abraçando | Fonte: Unsplash
Aqui vai outra história : Minha mãe ficou trancada em um armário durante meu casamento. Mas o verdadeiro choque chegou quando descobrimos quem fez isso e por quê.
Este trabalho é inspirado em eventos e pessoas reais, mas foi ficcionalizado para fins criativos. Nomes, personagens e detalhes foram alterados para proteger a privacidade e melhorar a narrativa. Qualquer semelhança com pessoas reais, vivas ou mortas, ou eventos reais é mera coincidência e não intencional do autor.
O autor e a editora não fazem nenhuma reivindicação quanto à precisão dos eventos ou à representação dos personagens e não são responsáveis por nenhuma interpretação errônea. Esta história é fornecida “como está” e quaisquer opiniões expressas são as dos personagens e não refletem as opiniões do autor ou da editora.


Leave a Reply